Making Glass Art Sculptures
The whole series of processes are exhilarating, partly because I never quite know how things will turn out. The moment I open the mold to see the glass figure for the first time is worth everything! Glass is my medium of choice, and I’ve been working almost exclusively in glass for the past fifteen years. I believe it is, by far, the single most exciting medium, in part because you have absolutely no certainty with regard to the outcome. The process itself requires tremendous patience, but I love it – the colors, transparency, and the way light makes each piece come alive.
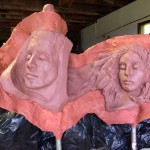
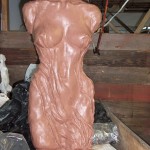 Clay
Clay
All my work begins in clay, and I may spend a month or two sculpting. Once I feel the clay piece has reached a certain point, I stop. I then analyze how I will ultimately translate the clay sculpture into glass.
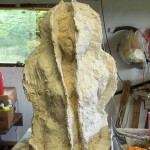 Mold
Mold
Next, I build a rubber mold over the clay sculpture. This is accomplished by applying many layers of a liquid rubber over the entire piece. The rubber mold captures every detail of the clay sculpture. Once the rubber dries, a multi-piece “mother mold” is made out of plaster and burlap. The separate pieces are bolted together in order to secure the inner rubber mold. After it dries, the rubber mold is pulled off the clay. It is then thoroughly cleaned and placed back into the mother mold.
 Wax
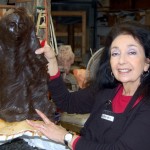
Wax
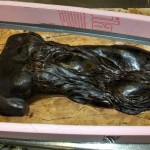
Several layers of molten wax are then painted layer by layer into the rubber mold – each layer applied at a lower temperature. Once the wax cools down, it is carefully pulled out of the rubber mold and placed in a tub of cold water where it cools further.At this stage there is an opportunity to make another artistic decision. I decide how much of the wax piece I will use. I may also add a fragment, in wax, from another sculpture I’ve made.The wax sculpture is then “re-tooled” – gone over with an exacting eye and touched up with hot wax tools.
The Final Mold
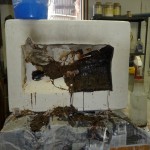
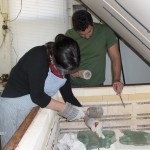
The wax sculpture is attached to a ¾-inch piece of wood, and more boards are used to build four sides around the wax sculpture approximately three inches from the edges of the wax. The seams are secured and sealed. Chicken wire is laid across this open box and attached to the sides in order to strengthen the structure.Plaster and silica flour are mixed with water and then poured through the chicken wire until the box is filled – covering the wax sculpture by at least three inches. After the mold sets up, the box is removed. With the plaster mold standing upright the wax is melted out. I use a blowtorch and spray bottle of water – alternatively heating and then cooling so the mold is not dried out too quickly.The plaster mold, which can weigh up to 300 pounds, is carefully lowered into a computerized oven, where it dries at a temperature of 275-degrees for up to one week.
 Preparing the Glass
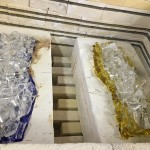
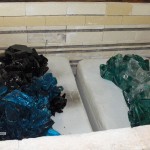
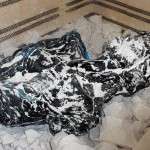
I use glass slabs or dalles that have been broken up into pieces with a mallet and sorted by color and size (ranging from a nickel to six inches). The mold is then filled with layer upon layer of glass until it’s mounded above the top of the mold – up to three times its volume. Each piece of glass is placed where I want that specific color. This delicate process can take from three to five hours (provided the mound doesn’t collapse and I have to start over!).
The Firing Process
The firing schedule establishes the number of hours it will take to melt the glass: The oven is set to rise to 1150-degrees over 18-24 hours. Then, the temperature is adjusted again and set to reach between 1475-1500-degrees in one hour. The oven remains at this high temperature until the glass is flame-red and molten, which takes from four to ten hours.The annealing or cooling down schedule can take up to three weeks: The oven is turned off. In order to bring the temperature down quickly, the door is repeatedly opened and closed, a process called crashing. When the temperature reaches 975-degrees the oven is programmed to hold that temperature for 24-hours and then drop very slowly over four to five days until it reaches room temperature. Some glass requires a slower annealing schedule even up to three weeks.The sculpture stays in the oven another two days until the oven is cool. The plaster mold is gently broken away and the glass sculpture is revealed for the first time
 Finishing
Once cooled and out of the oven, diamond files and pads are used to remove seams and finalize the look of the piece. (This is another process that takes several days).The final step is the creation of a metal base. I work with a local craftsman who translates my vision into a structure to support the sculpture.
